


Self-Rising Crunchy Sugar Cookies
April 9, 2020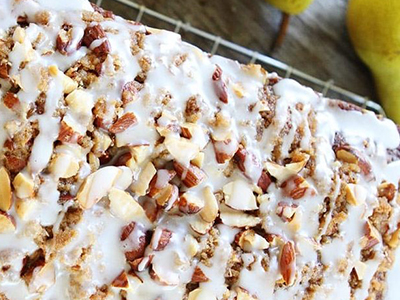
Pear and Almond Streusel Bread
April 29, 2020Basic White Loaf
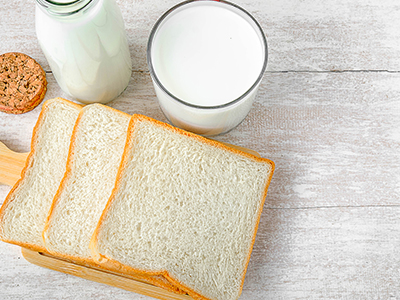
Ingredients
- 600g BFFM Premium Flour
- 1 1/2 Tspn Salt
- 1 1/2 Tspn Dry Yeast
- 360ml – 380ml (dependant on flour water absorption)
Method
MIXING:
- In a large bowl, dissolve yeast in ambient temperature water; let stand until bubbles form on surface. Mix together with remaining salt and about 90% of the flour.
- Mix until combined.
- Stir in enough of the remaining flour to form a soft dough; not too sticky. Kneading bread dough is simple. Flour your worktop, then push, pull and stretch the dough until it’s nice and smooth (Approximately 8 – 12 minutes). When it’s properly kneaded, the dough should be stretchy and smooth. You should be able to stretch a piece of dough thinly enough to be almost see through – this is called the gluten window and indicates that kneading has been done correctly and is ready for proofing.
PROOFING THE DOUGH:
- When finished mixing/kneading, gently shape the dough into a round and place in a proving box, a lightly oiled bowl that is double the size of the dough. If using a bowl seal with lid, plastic wrap or damp tea towel to prevent a skin from forming on the dough whilst resting. The ideal temperature for proofing/rising bread dough is around 30°C. Leave the dough to proof until it is double its original size – approximately 40- 80 minutes, depending on the temperature of the proofing environment, temperature of ingredients and type of recipe.
- Once the dough has doubled in size, turn the dough out onto a lightly floured surface and gently knead the dough. Cover the dough again and allow it to rest until the dough again returns to the expanded size.
- Shape the dough to desired size or cut into suitable shape, approximately 800gms for a standard bread tin or 80g for rolls, and place in greased bread tins or on baking trays. Leave the bread to rise in a warm, moist environment until the dough almost doubles in size or reaches the top of the tin, the time may vary depending on environmental conditions – humidity and temperature.
BAKING:
- Pre-heat the oven to 220°c.
- Carefully place prepared loaves in the oven avoiding sudden movement which may cause dough to drop back.
- Bake at 220°c for approximately 25 – 30 minutes for a standard white loaf.
- Check if the loaf is cooked by tapping the bottom of the loaf – it should sound hollow.
- If done, if it doesn’t then return it to the oven for another 5 – 7 minutes.
- Once cooked, place on a rack and allow it to cool for at least 30 minutes. If baked in tin, bread should be removed from the tin and placed on racks immediately after being removed from the oven to prevent the loaf from collapsing.
- Allow bread to completely cool before placing in bag, container, wrapping or cutting.
TIPS: For hand kneading water should be at normal ambient tap temperature. If using a mixer water should be cold (Approx. 12-14°c) to allow for heating during mixing.
Try using bread improver to improve your loaf. For a more tender crumb substitute a tablespoon of water with tablespoon of oil.
NOTE: Oven temperature and temperature control may vary between 200°c and 230°c. The exact temperature required being dependent on the oven itself, type of bread, size and/or number of loaves. Typically, the temperature of the oven should be set so that the loaves will start to “colour” in about 12 minutes after being placed in the oven.